Hello, I am a maker of a wide variety of genres. I have worked as a Architectural model maker, designer, tool maker and graphic designer.

To view my online Photo Portfolio of my Architectural model making please go here.

This blog is where I document my personal and commission projects with photos and write ups.

Please read my about me page for contact info and how to enquire about commissions or plan purchases.

Plans for sale : here

4 May 2020

Death Star Escape DVD (book) Nook

I have wanted to make a book nook for some time, so taking advantage of the lockdown situation where we are at the moment I decided to give one a go. 

I tried to think of things to make a d I have lots of ideas.
I settled with a Star Wars themed nook. 

Seeing as we have more Star Wars DVDs than books (of the same size that sit nicely together) I came to the conclusions that a DVD nook was what was called for. So here it is. 

I forgot to take progress shots of the making so you will just have to live with the finished item and a quick explanation of what I did. 


All the materials were ones I had in the house so there are probably ways to make it better, but I used what I had. 

I made the whole thing at an HO scale (1:87) as that the scale I like to work at. 


The outer box was made with 2mm headboard and just glued together with the top loose to allow for battery changing etc. It is held on with magnets. 


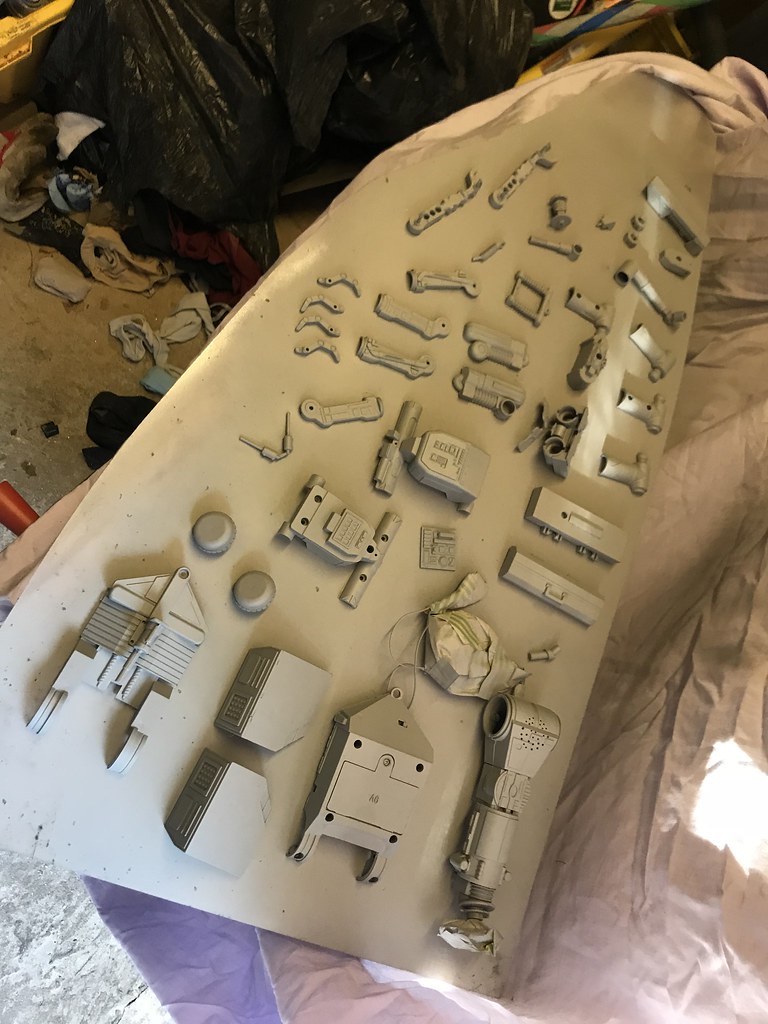
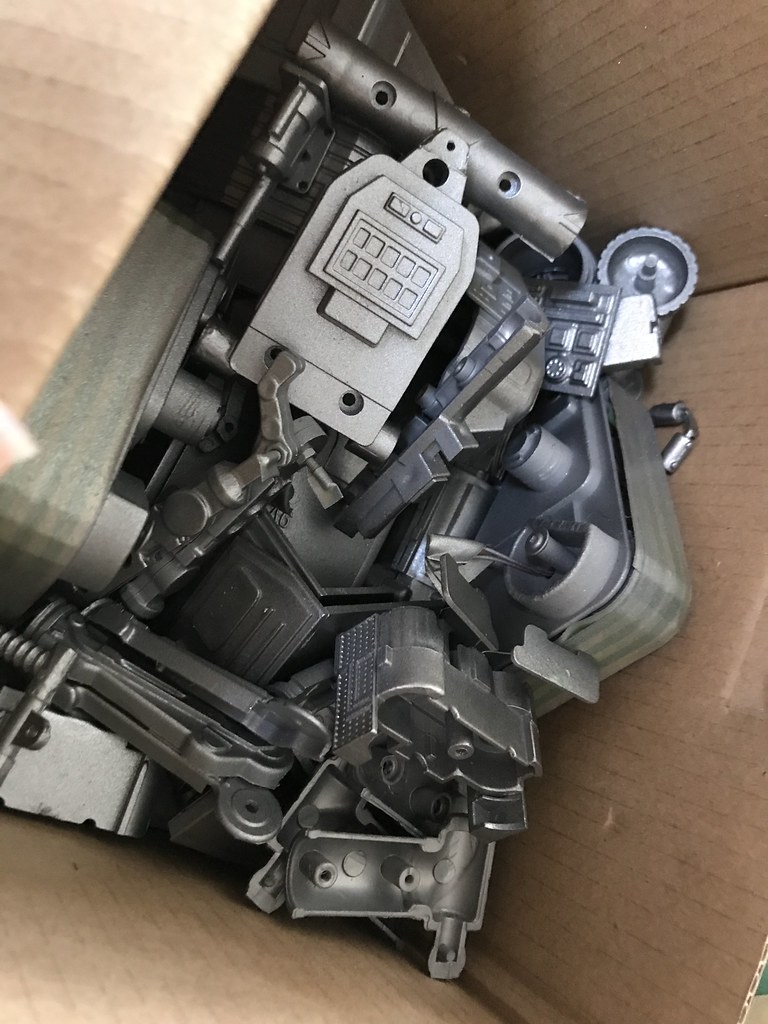
All the detail parts are 3D printed on my ender 3 in PLA and painted grey (as I only had white filament. 


The walls are angled to give an illusion of depth and to allow for lighting to go behind the panels to light up the details. 

The figures are HO figures cut up and customised to look like Luke and Leia swinging to freedom. 
The stormtrooper in the background is not too well made but his right back there so you can see how poor the details are. 

It’s about the width of 4 standard DVD cases. So it fits in our DVD rack with the prequels on one side and the original trilogy on the other. 

Any questions please ask.  

22 March 2018

Blade Runner Water Pistol.

Blade Runner Water Pistol Blaster Paint Up.


I recently just purchased a Water pistol by Fullcock. 
these are getting very costly on eBay and other selling websites, I got mine from japan for a good deal cheaper than all of the eBay selling places, and it took a good month or so for delivery.  

when it came i was very excited. This gun will go with my Han Solo blaster with an idea to complete my trilogy of Harrison guns. The third being one of the pistols from Indiana Jones films. (although this may be a little hard for me as being in the UK its hard to find correct (realistic looking) replicas of real fire arms.)   

The water pistol came in a rather cool looking plastic bag. All the information is in a language i have no clue how to read but it doesnt really matter here.  
The content of the bag were as such:

The water pistol itself and two little clippy on things. 
The orange one being for UK laws, any replica that looks like a real gun (almost anything that's gun shape) has to have an orange tip to show its a fake/toy gun. 
The little black ring when clipped on looks more realistic and that is the option i will be putting on my water pistol. (im not going outside with this gun, and if i do i can put the orange tip on) 

The two sides of the water pistol. 
This water pistol is a pretty good replica of the blaster used in the film. 

 It is a fairly good size and fits in the hand really well.

I started prepping the gun by masking off the amber grips, i am masking these off as trying to remove them feels like it would crack either the grips or the body of the gun, this is not what i want to happen.
The orange handle of the gun is going to be the only bit i do not paint as the original props had lovely amber transparent grips.

Once the grips are masked off i started with filing and sanding down the seam of the two halves of the plastic shell.  The reason for this is two fold, one is to remove the visual line that the join makes when painted. two is because I will have to sand the whole gun to give the paint something to grip to. 
i went all the way round the guns joining seam and sanded it down feeling it and looking at it under the light to check i had removed the seam correctly.

 Above is the Water pistol once i had given the whole thing (the bots i could get to with the sand paper.) a rubbing with some fine sand paper.

I painted the whole gun with some grey plastic primer. 
Once the paint was on the gun the details really came out. The detail that the designers have gone to are really great.
 When the primer paint had dried i gave it a coat of silver chrome. this will be the main colour of the gun then i will remask the silver and paint certain parts black.

The chrome paint didn't come out as well as it has before. its a little flat and dull. 
I feel there are two reasons for this. The paint i used was a little old and the temperature was very low when i painted it. Environmental factors play a great part of how well a paint comes out, and this is a perfect example of why you should have a good temperature when spray painting. 
  

(this step is here and i did do it honest i just forgot to photograph it!) 
 when the silver had dried i masked all the parts i wanted to keep silver and then spray painted the gun with a flat black. 

Once the black paint had dried I removed all the tape to reveal the colours and the lovely amber grips. 
Even though the silver isn't as good as I wanted it turned out OK. 
In the above photos you can see some parts where the black has seeped under the masking tape, I will correct this in the weathering and finishing steps later.


 Finishing the gun was a multi stage process and i totally forgot to take photos of it step by step but here are the final results.

First i used some chrome brush on paint to brighten up the silver sections (after the poor spray paint results)
The chrome paint was great at covering up the errors in the black coat (where it had bled under the masking etc)
When the chrome paint had dried I used it again to dry brush the black parts to give the effect of worn paintwork, to make it look like it was painted worn metal.

I then used some black acrylic paint to weather the silver sections of the gun and to touch up parts that i masked off when i should have left it to get sprayed black. (namely the rear of the handle.)
using the black to weather the gun gives it a used look. It also gets in the small fine detail, the text and the grooves and parts that would gather the oil and grease that a gun would collect.

Once the black had dried i used a small amount of brown (rust) acrylic to detail the rear of the silver sections. (the reference photos of the original blade runner gun i found had dirty rusty grime) i replicated this, it gives the whole weathering more depth.

I left the amber grips completely clean save for painting the bolts/screws that are moulded in the amber plastic.
Before and After shots.
Above and below are before and after shots of the water pistol, to show the difference the paint job made to the toy water pistol.


My Indiana Solo Deckard trilogy of replica blasters is nearly complete. 

All i need now is a replica of one of the guns used in the Indiana Jones films (original trilogy of course)   

2 March 2018

Johnny Five Is Alive!

I recently purchased a model kit of the robot from the film short circuit. 

 http://wantedmall.com/image/cache/data/RC%20Mini%20J5/J5%20RC%20Kit-2.-299x299.jpg
 This is how i got the kit from the website : wantedmall
lots of bits an no instructions what so ever. (this photo is from their website.) 


The kit is ok but the molds seem old and a bit tired so there is quite a bit of work involved to get it built and working properly. 
I also made myself a little butterfly for Johnny to look at. 
I dry built the kit (no glue) so i could take it apart for painting and tinkering. 

No Disassemble Johnny Five!  
So after i built him i took him apart again. 
I didnt take him apart fully i left him in as few parts as possible.
I masked off the bits that couldn't deal with paint. (electronics, lights and gears etc.) 
 
It was still quite a lot of bits! 
  
After  masking i painted the whole lot with a primer and then a metallic dark silver paint. i didn't think he should be painted chrome or bright silver so that's why i went with the dark silver.
  Again i rebuilt him into a few bigger parts and masked him off again, this time leaving just the parts that are to be metallic blue uncovered.
Now is the part that where i forgot to take photos..
 
After spraying the blue parts blue, I removed the masking and built johnny fully. 
i then used a few acrylic paints to do the details. black, brass, silver (chrome) and red. 
these details were found by looking at reference pics of the original robot from the films.
Below are some photos of my finished Johnny 5 robot.